Edited to add: Nicolette just reminded me that block B-7 was almost exactly the same as this one and I think my method over there may have worked better.
Out of your main fabric, cut a 6" square and cut it in half diagonally twice. Some people choose to leave the square as solid and skip this step.

Reassemble the square.


Also out of your main fabric, cut a 4½" square. Ignore the folds. They were part of the attempt at something that didn't work out.

Print or trace the block diagram onto freezer paper TWICE and cut out the center of the circle, making sure to leave the melons intact on one of them.

Prepare the melons for applique using the method you prefer. I used the same method I used in block E-1. Because you'll only see one side of the melon there's no need to finish off both sides. Leave a generous amount of fabric on the unfinished side of the melon.

Now here's where I had to experiment.
Take one freezer paper square and lay it down shiny side up. Carefully position the melons around the edge of the cut out circle (a light table works well here because it allows you to see the edge of the freezer paper circle through the fabric) and iron them into position by ironing the fabric sticking out from the unfinished side to the freezer paper. (See how you can see the freezer paper at the meeting points of the melons? Don't do that. Make sure the sharp points are formed before the edge of the freezer paper. You'll see why at the bottom of this post when you see my block.)

Lay the 4 ½" fabric square on your ironing board right side up. Lay the freezer paper with the melons attached on top of it, lining the edges up carefully. Using a hot, dry iron, iron the freezer paper to the right side of the square.

Applique the melons onto the background fabric square. Remove the freezer paper from the top and the insides of the melons.

Iron the other freezer paper square (remember, you made two), to the right side of the pieced fabric square, carefully lining up the diagonal lines on the freezer paper with the seam lines on the square.

Cut the circle out of the fabric, leaving a seam allowance for turning in the edges when you applique. Make clips to within 2 or 3 thread of the edge at ¼" intervals around the edge of the circle.

Place the smaller fabric square right side up on a table, then place the larger square right side up on top of it. Carefully line up the meeting points of the melons with the diagonal lines on the freezer paper. I basted the seam allowance on the cut out circle back at the seams to allow me to line it up more easily. Baste around the edge of the circle far enough away from the edge to allow for the turning under of the seam.

Reverse applique the top square to the bottom square along the edge of the circle. Remember C-9 way back when?
Trim the block to 5" making sure to keep everything centered and remove the freezer paper.
I'm not 100% happy with this block because I think the melons should have stuck out more. I may redo it.

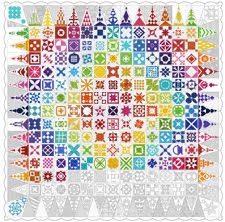
I made this one a couple of months ago (and can't remember how I did it). I'm much happier with it but it's for my red-and-white Jane.


in case you are trying not to mention any key words that can be googled, you did mention the "J" word in this one
ReplyDelete~a
Made this one up today. Thanks for the tutorial! That was so much easier than actually piecing the block I think.
ReplyDeleteRachel